|
|
Post by mtntech on Jun 20, 2012 17:15:31 GMT -5
I have been involved with turbocharging 4 stroke snowmobile engines for about 10 years now. The gains are roughly 10HP per LB of boost. I'm at about 250 HP on my Yamaha Nytro. It's a 3 cylinder 1050 mill. No internal mods. Head shim, valve timing, and fuel system upgrades.
|
|
|
|
Post by joeld0803 on Jul 6, 2012 20:21:09 GMT -5
I spent the whole day relocating my rack and pinion to square it up with the steering arms on the spindle. It was too far forward throwing my ackerman off. Needless to say when I moved it back I then had to cut down my steering column legth by 2 1/2 inches and taking that dang thing apart was a chore and a half. Google is an amazing thing though and read up on what to do when I got stumbled and couldn't figure out what was next in the process. I about threw the thing across the shop.........but I didn't and I regained my composure and took a step back and figured it out. I spent roughly 4 hours on just the steering column fix. Tomorrow if I feel like driving to the shop to work on it I'll be putting the steering wheel back on and working on the floorboards. Got the seats ordered today. 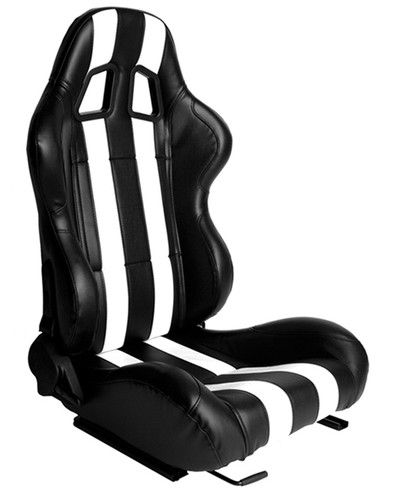 Hope the quality of them is decent. I think they will look nice but I hope the quality is good. Does anyone have experience with these types of seats? |
|
|
|
Post by Liteway on Jul 7, 2012 7:48:00 GMT -5
Who makes them? Looks similar to my seat I got at Pep Boys. I think its of Chinese origin. Mine is comfortable with good padding, seat springs and lateral support, but so heavy I've been looking for a lighter single piece replacement for some time. Only quality problems in several yrs and 3500mi of use are the ilets for the belt pass through are trimmed in a brittle plastic that has cracked and the red vinyl is faded even though the trike is always parked in the garage. Only cost 140 bucks though.
|
|
|
|
Post by joeld0803 on Jul 7, 2012 13:52:03 GMT -5
I found them on Ebay for 345.00 a pair and I believe the copmpany that sells them is called Cypher.
They are probably foreign but I hope they last at least a few years.
They looked well built from the the stitching and they weigh approx 24lbs each I think so yea they are a little heavy but I would rather have comfort over light weight. I decided long ago I wasn't building it for racing.
|
|
|
|
Post by Liteway on Jul 7, 2012 15:27:36 GMT -5
24 lbs is not heavy for a rake adjustable seat. Mine weighs about 40 and another 4/5 for the mounting tracks.
Those are nice looking seats.
Please weigh them on your own scales when you get them and let me know what you think of their comfort.
Loyd.
|
|
|
|
Post by joeld0803 on Jul 7, 2012 15:54:11 GMT -5
Loyd,
The website advertised them at 25 lbs but I will doublecheck.
I like the fact that the front edge of the seat isn't flat and it actually curves up some. I'll let you know on the comfort.
They should arrive sometime next week around friday I believe but we shall see.
|
|
|
|
Post by joeld0803 on Jul 13, 2012 17:39:26 GMT -5
Ok here are the latest progress photo's.......... Front expanded metal floorboards additional braces for the rear chasis engine compartment area. Dual fuel tank mounts completed and one in place for temporary until I mount the engine in. Welded up all the rear cockpit aluminum sheet supports which will allow me to anchor sheet aluminum between the rear of the cockpit and the engine compartment to keep out the noise and the heat. Seats came in and I just had to throw them it for temporary but all I need to do is drill the holes and and mount them in. I have to say I am Trippin..........getting excited with how it is turning out. Recent photo's 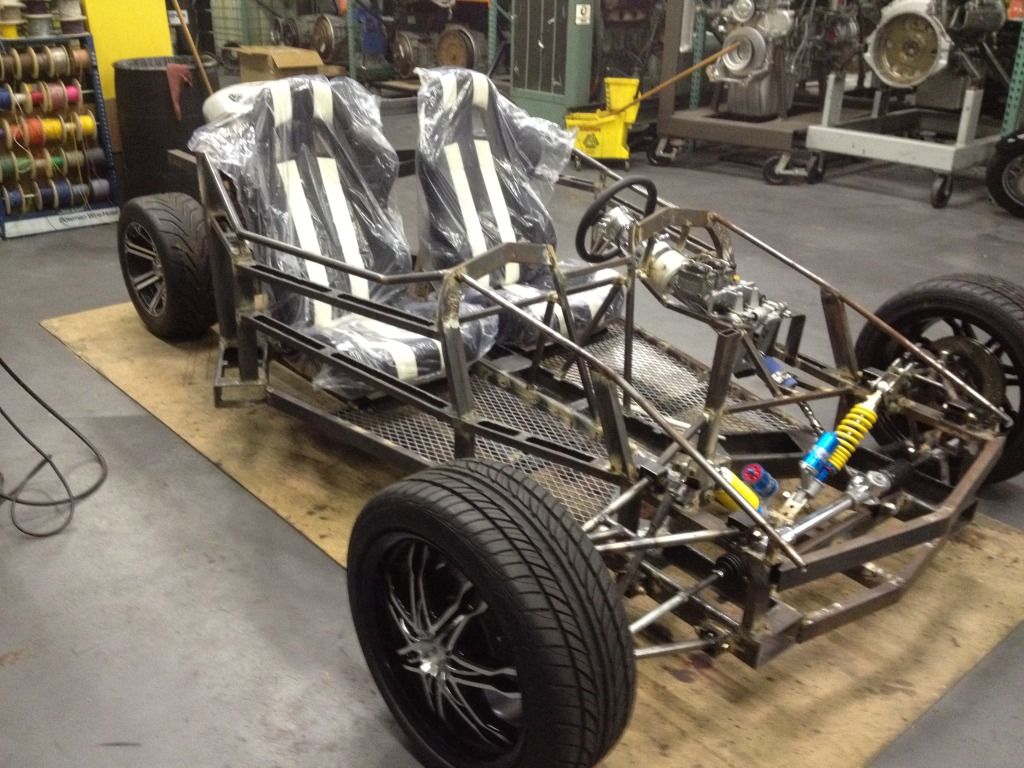 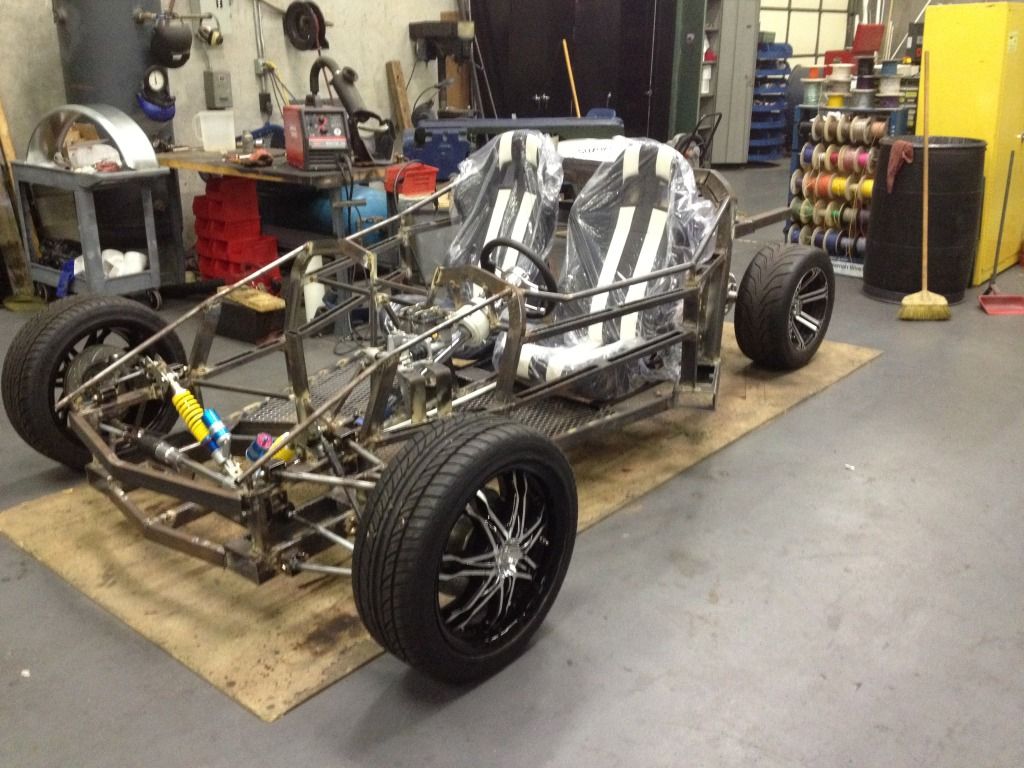 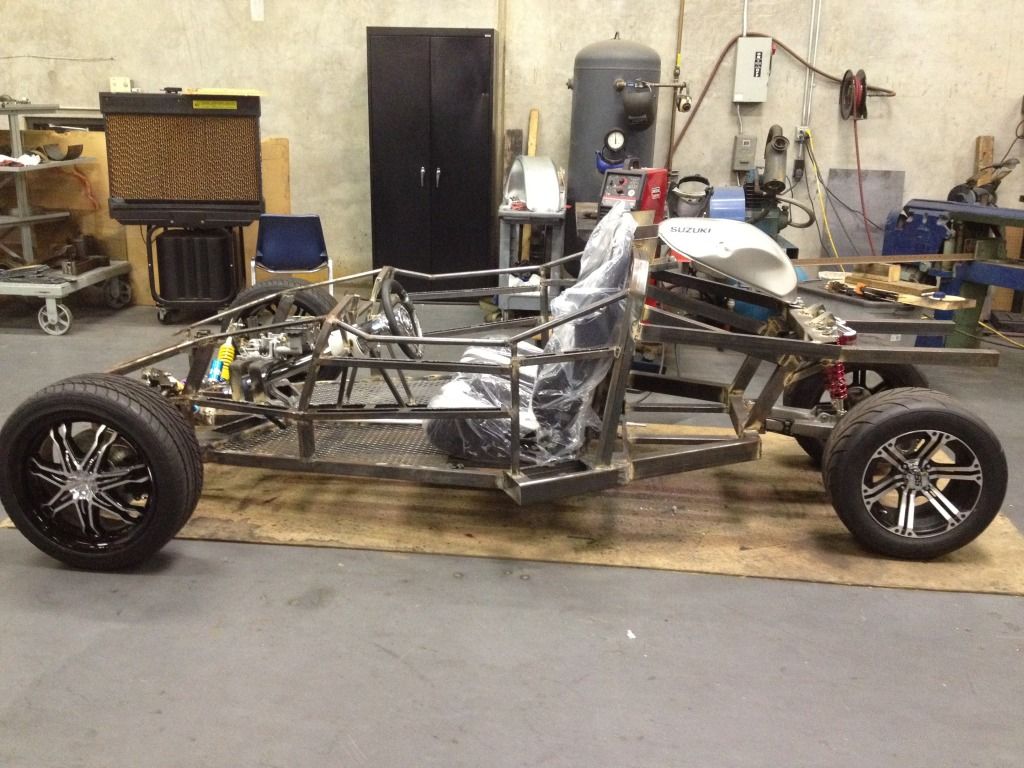 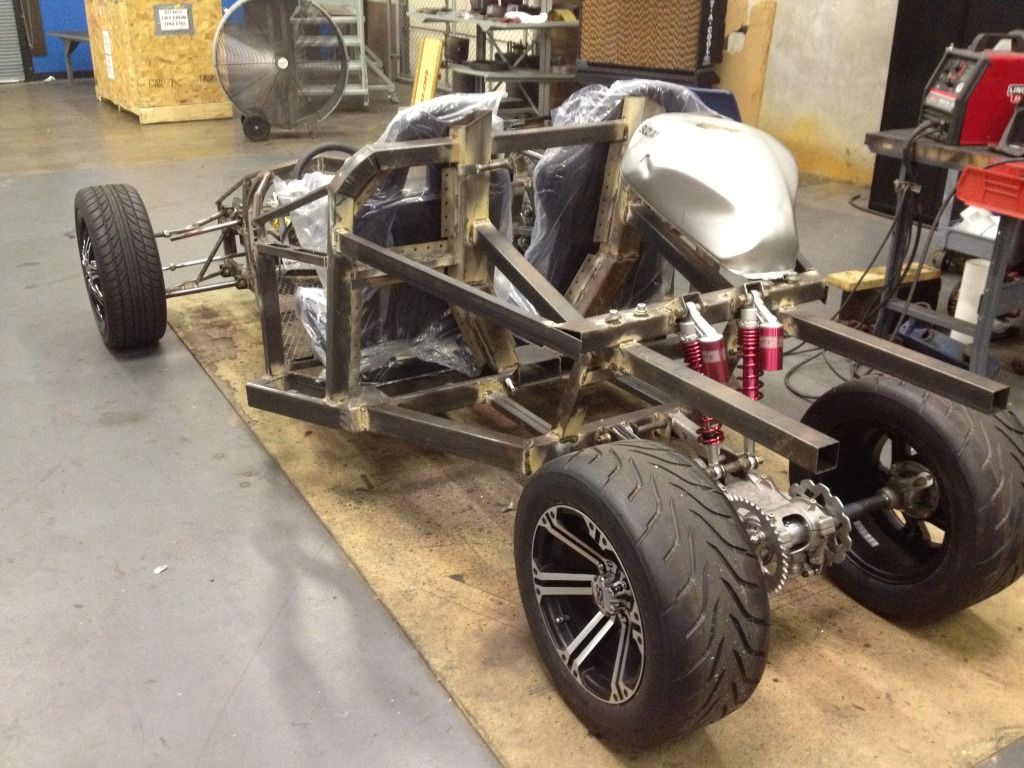 |
|
|
|
Post by captainamerica on Aug 15, 2012 22:05:21 GMT -5
Puegeot made something for you to shoot for I think.   The Puegeot EX1 Concept Car |
|
|
|
Post by Liteway on Aug 16, 2012 14:18:02 GMT -5
Better get a lawyer Joel, looks like Puegeot has gone and ripped you off.
|
|
|
|
Post by joeld0803 on Aug 16, 2012 19:10:31 GMT -5
Yea that is pretty sick looking and not too far off the path of my plan. However I am certain mine will be much cheaper when I am done. Not as elaborate but probably 45,000 cheaper......LOL!
I bumped into another 4 wheel similar design online that was Orange and although had an open roof concept it had a ceter brace down the center of the roofline. It too was unique.
They may become a popular design vehicle before it's all over with and mine will still be a "one" off and special to me.
I am installing the brake lines currently from the master cylinders to the calipers and once that is done hopefully the engine is next to go in.
I haven't had alot of time to work on it lately and needed a break to be honest but once I get started again it will start coming together.
I was beginning to think my thread died...........
It's been pretty quiet here lately.
Thanks for the post pics..........It's always helpful to see some new ideas come to life and to marvel at them. May even give me a few more ideas.
|
|
|
|
Post by joeld0803 on Sept 7, 2012 20:47:06 GMT -5
Ok so Between work and travel I had some away time from the project but I more or less needed a break anyway so I have been able to spend a few days working on it. Been priming the floor and frame and shooting some black paint on it. I got in a hurry and should have cleaned the metal a lot better but at least it has paint on it to protect it now. Most of it will be covered anyway with fiberglass so the frame won't really be seen anyway. Been working on the flooring under the seats as well as routing all the front brake lines and tieing them into the mast cylinder and started working on the rear brake line routing. I installed a pressure regulator for the rear in between the seats so I can adjust as necessary but come to fing out the valve I got doesn't work so they are sending me a new one. Adjusted either way I was getting no fluid out of it. I bled the brake line up to it and I have plenty of fluid there but when you loosen the line on the outlet side the pedal doesn't move and won't go to the floor and no fluid is coming out. I removed the internal guts from the valve and that at least allows the fluid to travel through it no so the rear brakes are connected and working as well as the fronts. I left the seat out until I get the valve changed out with the new one coming to have a little more room. Here are the recent pics. 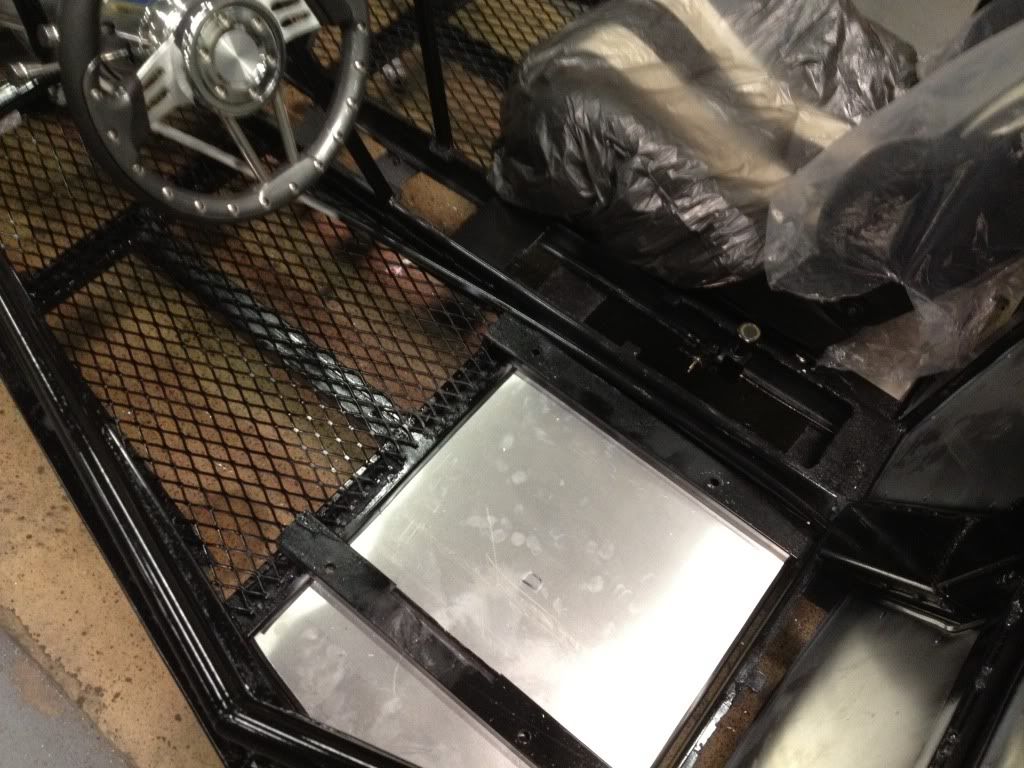 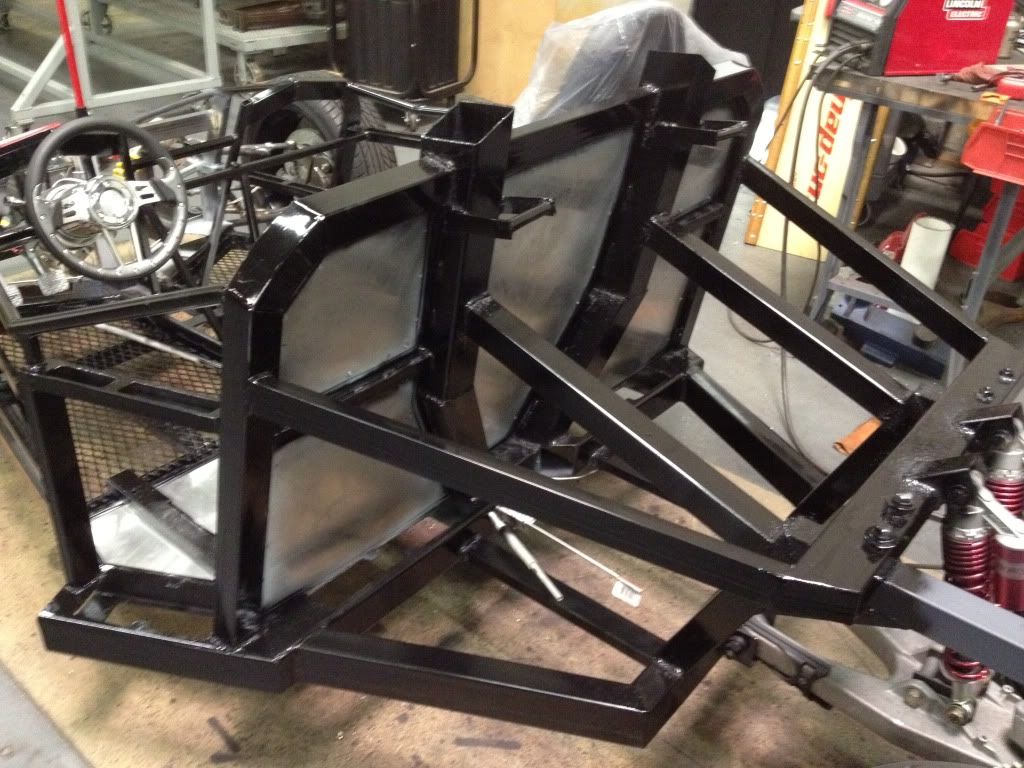 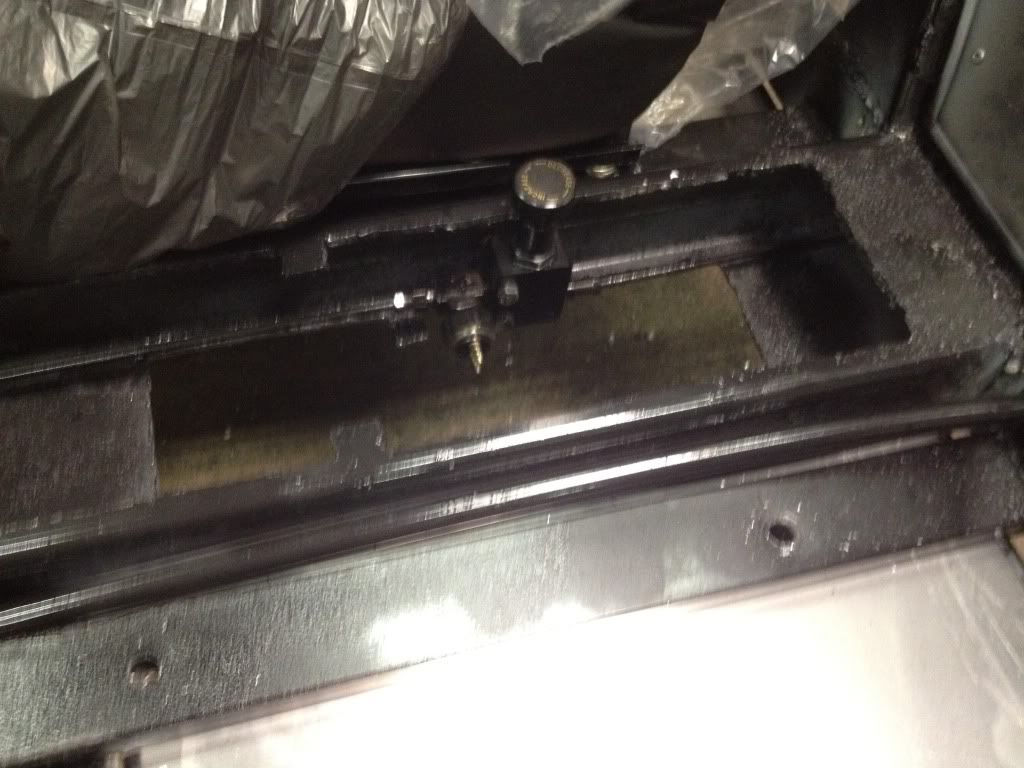 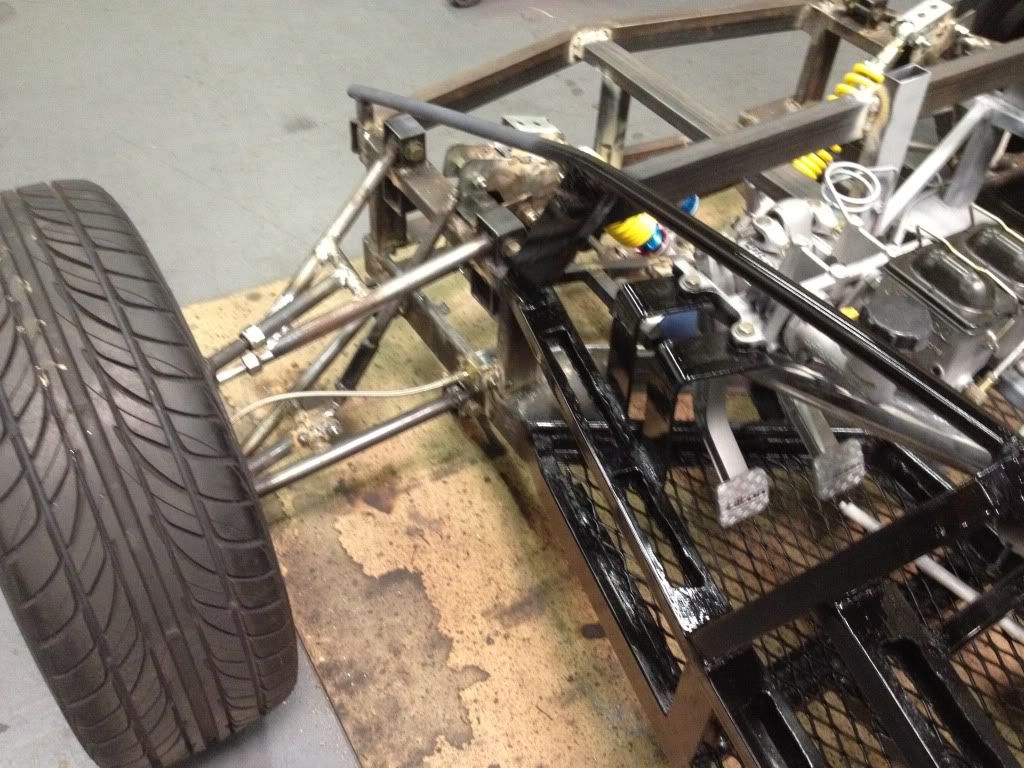 I also changed up the front shock cam geometry. It was a 2:1 ratio and I made it a 1:1 to stiffen up the front and help the shock load. Made a nice improvement there as far as stiffness goes. I am still debating on the rear shocks. I guess once the engine and fuel tanks go on I will decide if I need stronger ones there. I am still hoping to have the engine in and it running by November. |
|
|
|
Post by joeld0803 on Oct 4, 2012 20:26:50 GMT -5
Got the engine out of the bandit and started getting it mounted in the project. Next will be the wiring from it and all the relays. Ordered headlights too for the front end to get the process started on legalizing it. 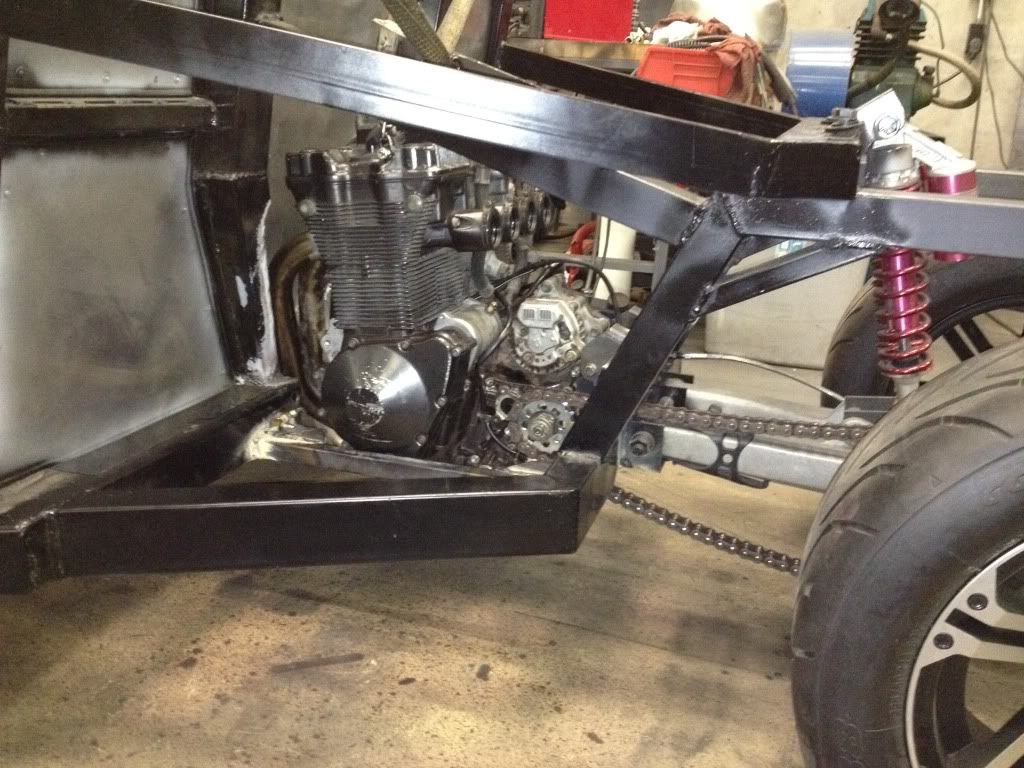 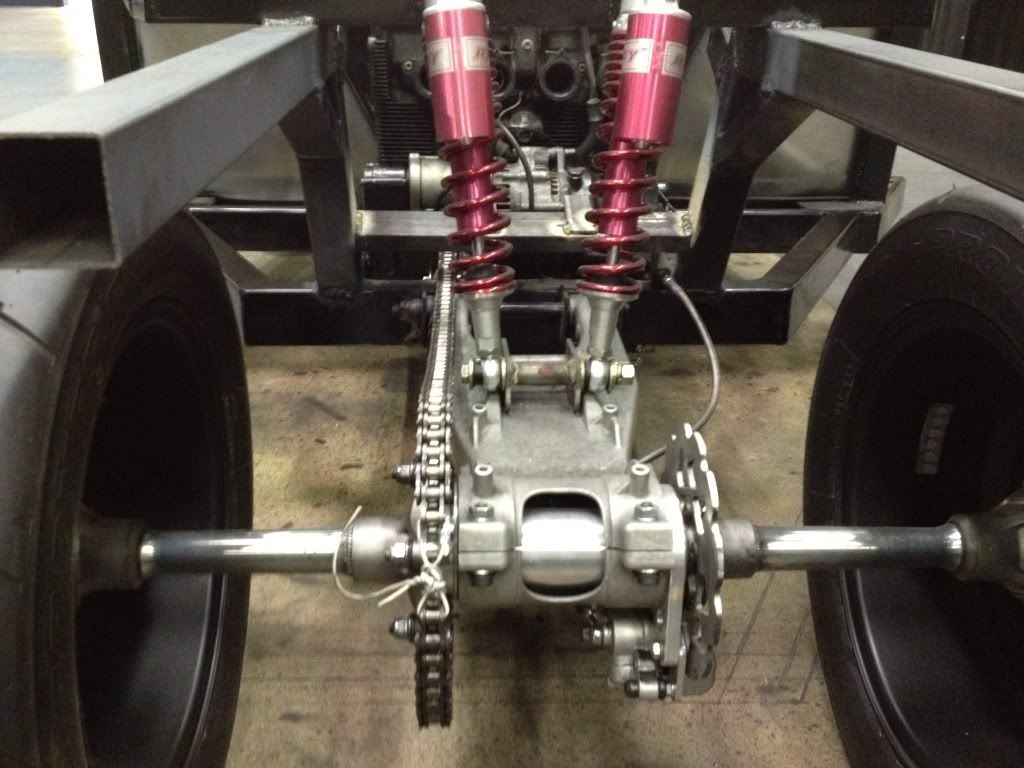 I only had to add 2 links to the chain to get the length I needed. I am still hoping to have it at least driveable by November and if all goes well that may happen in less than 2 weeks. Front and rear brakes are all working and clutch line is now connected to the hydraulic clutch. Carburators and Air filter housing are installed and fit perfectly in the area. I plan on using the stock bandit fuel tank to at least get the fuel line reconnected to start and run by the end of the week. Eventually I will have both tanks connected together to give me a 10.5 gal capacity. I still need to connect the throttle line and choke cable but that should be minor compared to everything else. |
|
|
|
Post by joeld0803 on Oct 5, 2012 20:41:57 GMT -5
Here are the recents from todays progress. I decided to take the day off since I have vacvation time and put a full 12 hours into it. 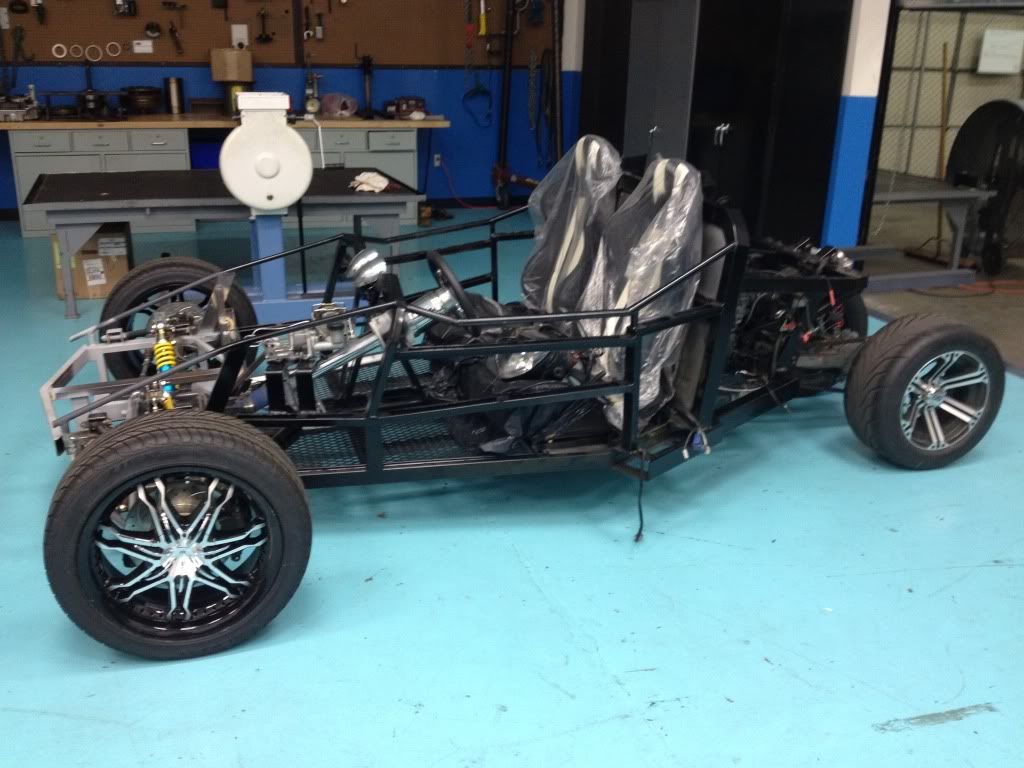 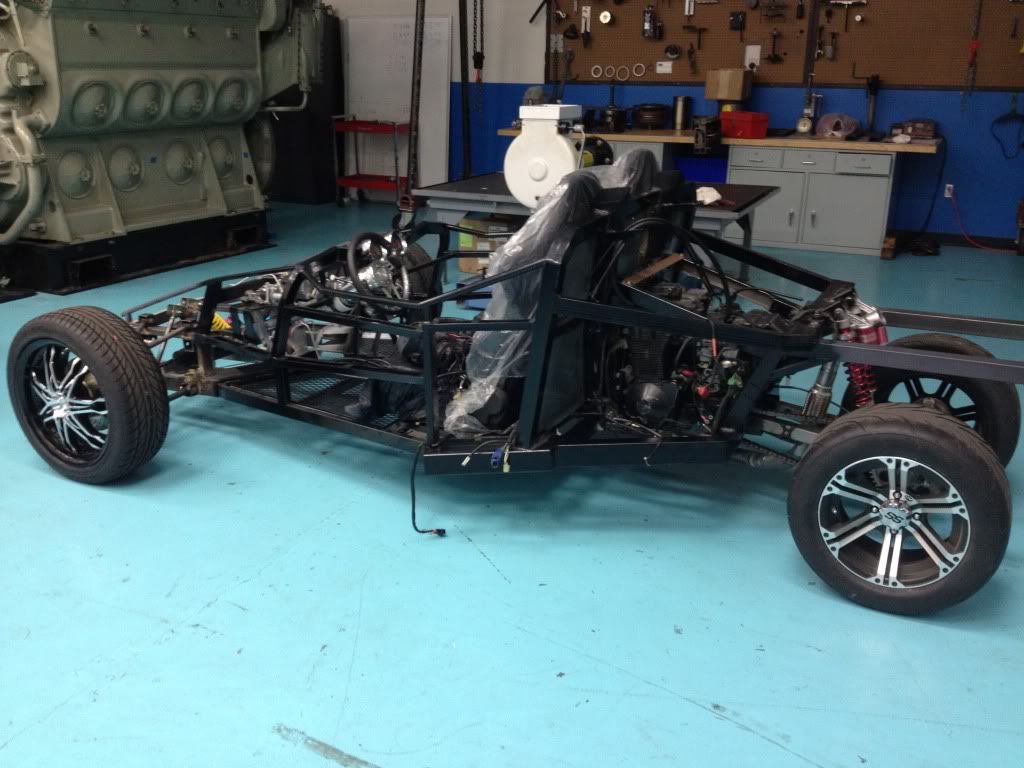 Finished stripping the wiring and comnponents from the bandit. Refined the back end shocks to stiffen it up a little and get a little more height in the back so the oil pan isn't quite on the ground. 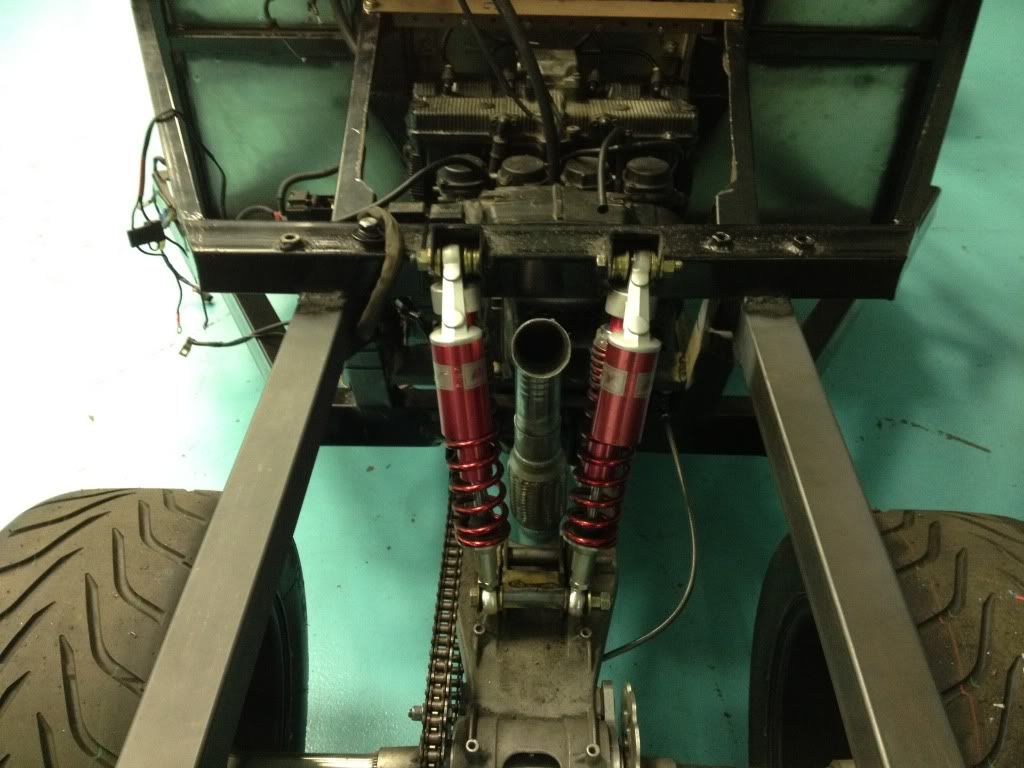 Fitted some exhaust pieces to get the exhaust going out the back the way I want it right down the center. Continued welding on the front egine mounts. 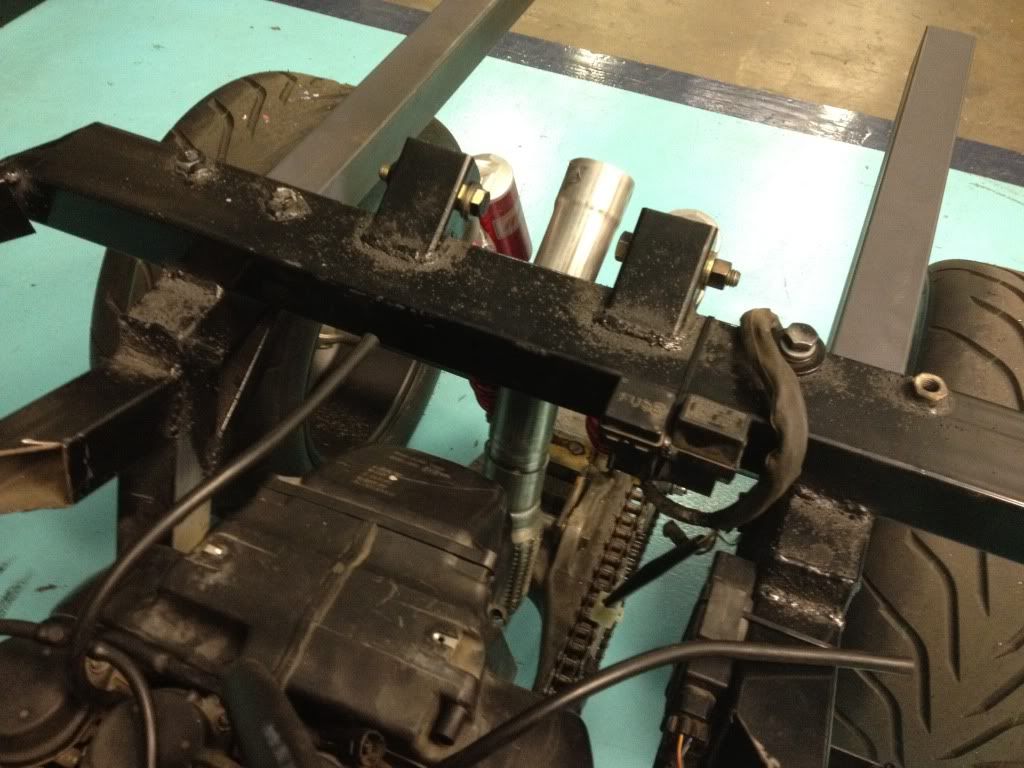 Worked on routing the wiring and lengthening some of it to get up to the coil packs and built a bracket for them which will also hold my oil cooler and a 14 inch electric fan to gice the engine some air flow. Also started mounting the electrical components. 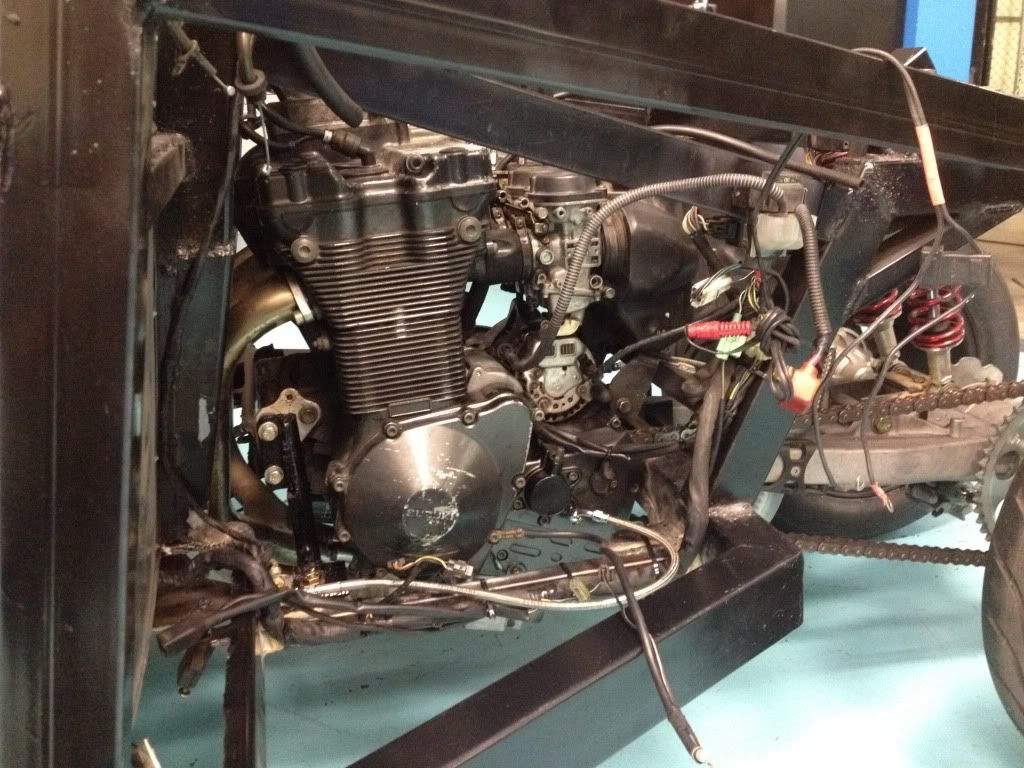 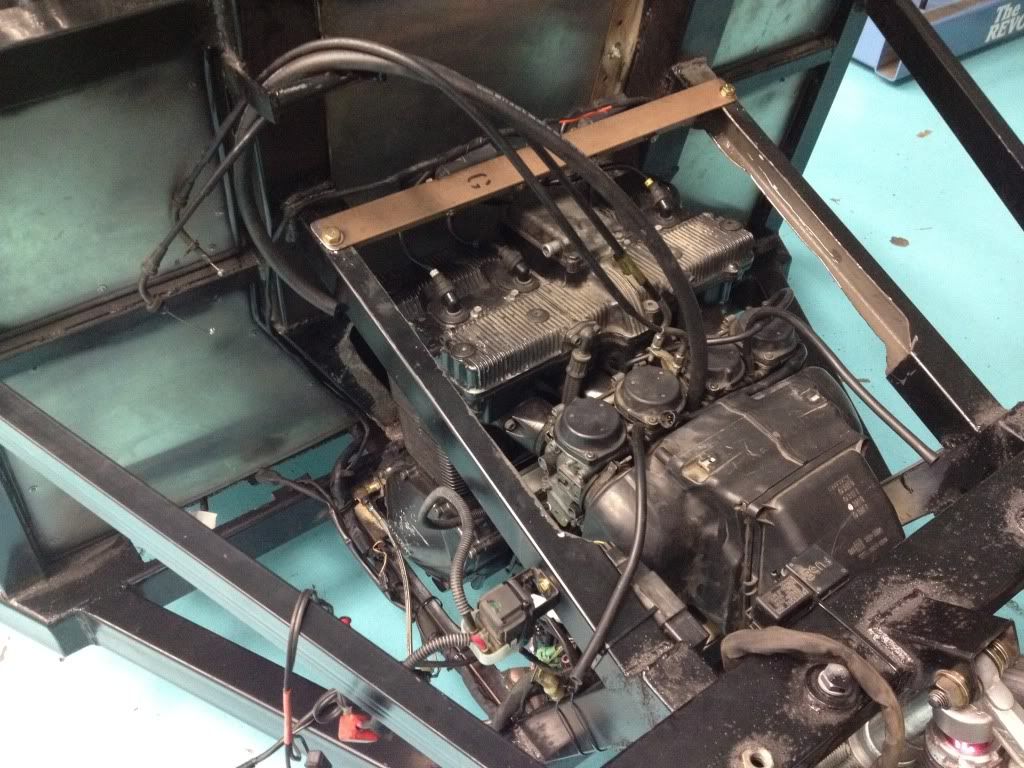 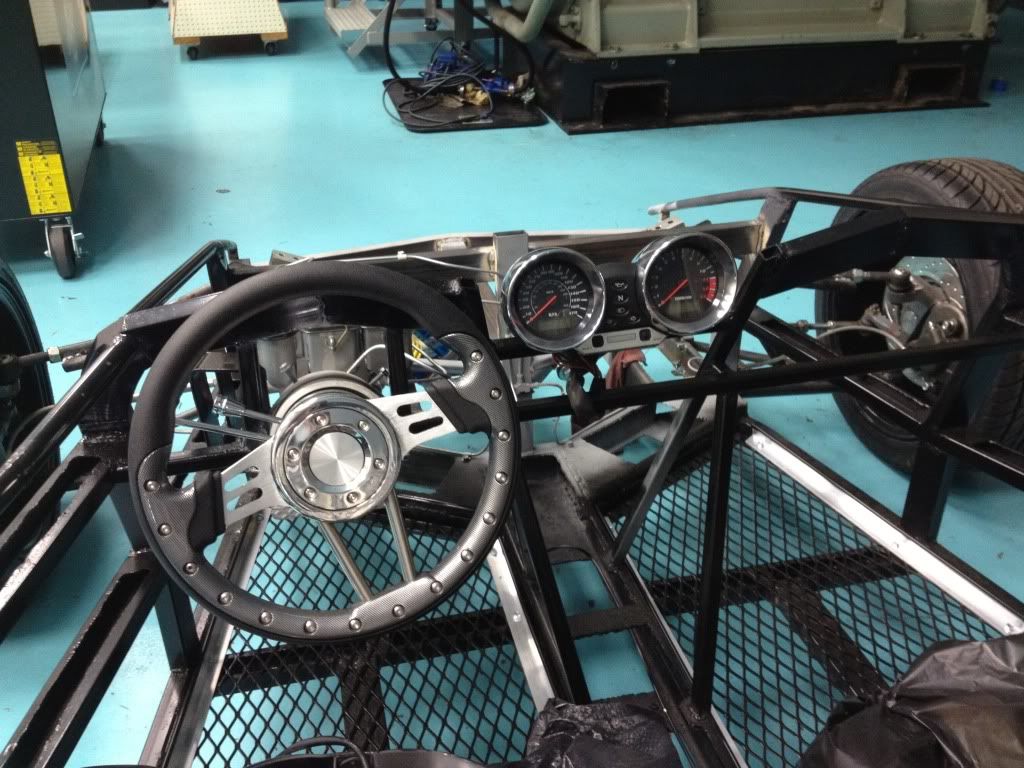 I am SO close to being able to fire it up and take it around the block for its first test run. I didn't want to stop working on it today. The tank mounts are already complete so once the oil cooler bracket is completed and the fan is in place I will be able to reinstall at least one of the tanks and connect the fuel and run it. Still need to lengthen wires for the instrument guages and the ignition and the front and rear lighting and horn. Maybe another 12 hours or so of initerupted progress and I will be ready to test drive. |
|
|
|
Post by joeld0803 on Oct 6, 2012 14:37:32 GMT -5
Continued today on the wiring and got a few more sections lengthened and connected. I got the instrumentation now mounted on brackets and got the mirrors installed. 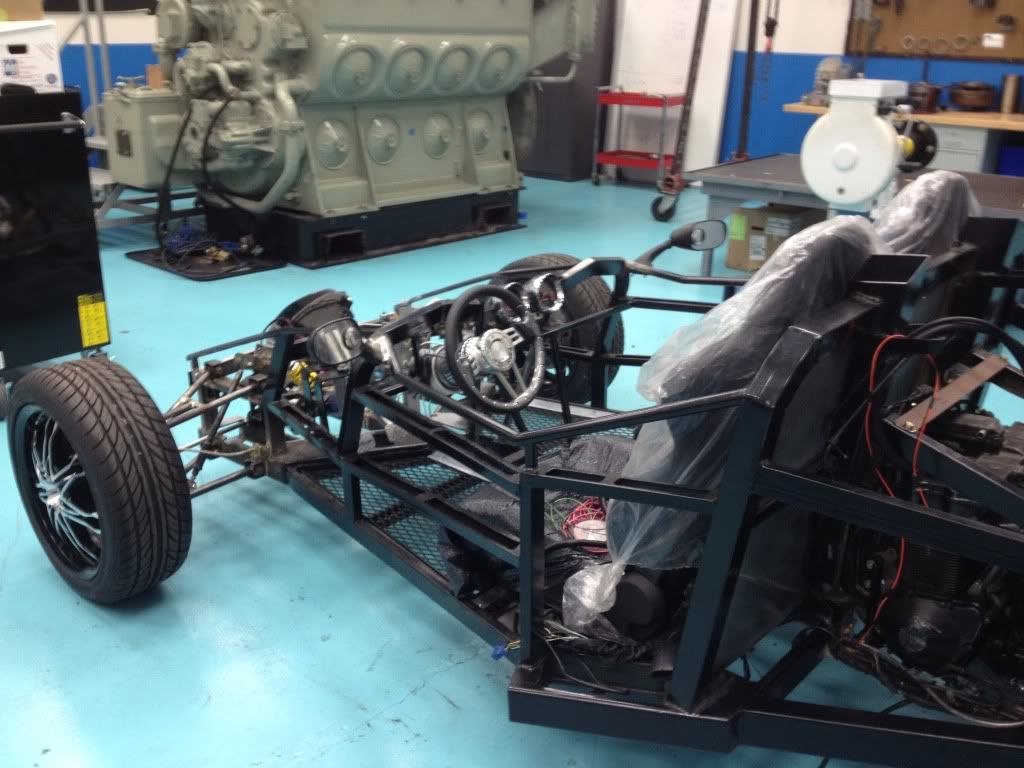 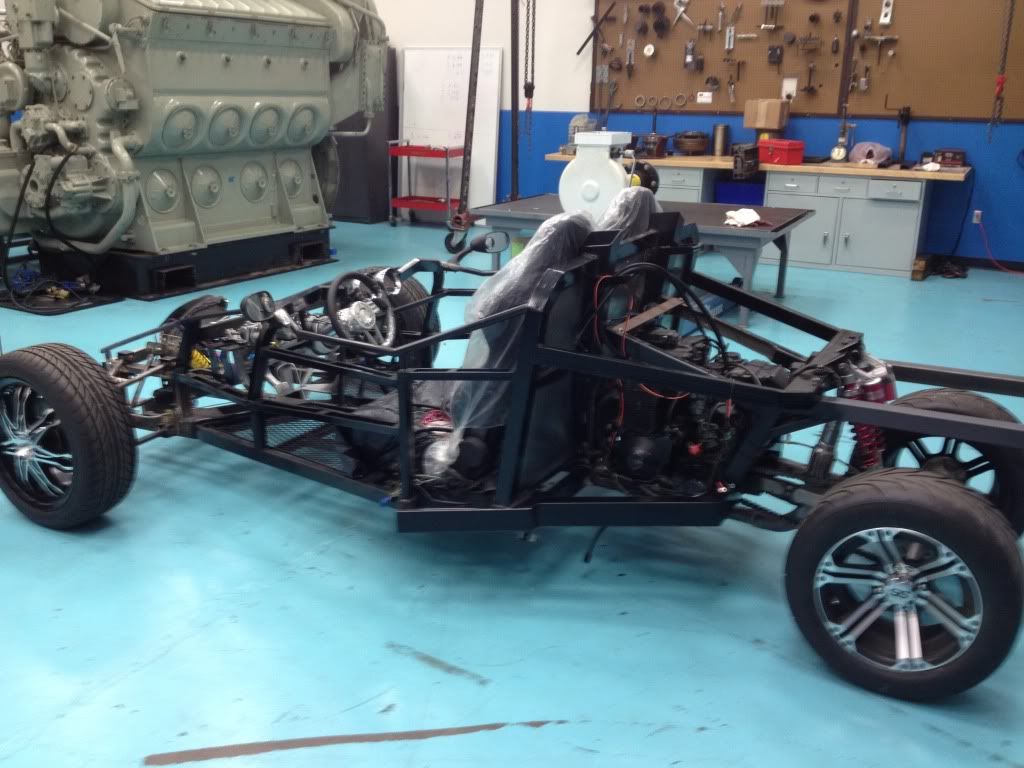 |
|
|
|
Post by joeld0803 on Nov 2, 2012 20:27:04 GMT -5
Got the chain tensioner built and mounted to keep up the slack during take off. 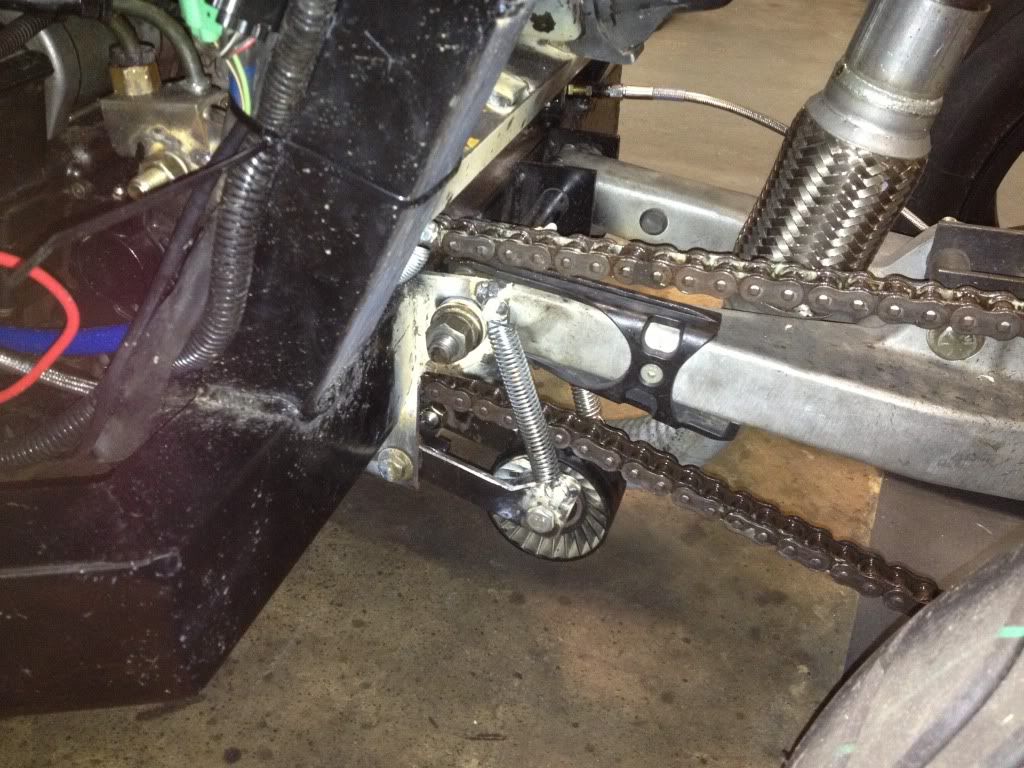 hand built shifter and throttle pedal almost completed but at least functional 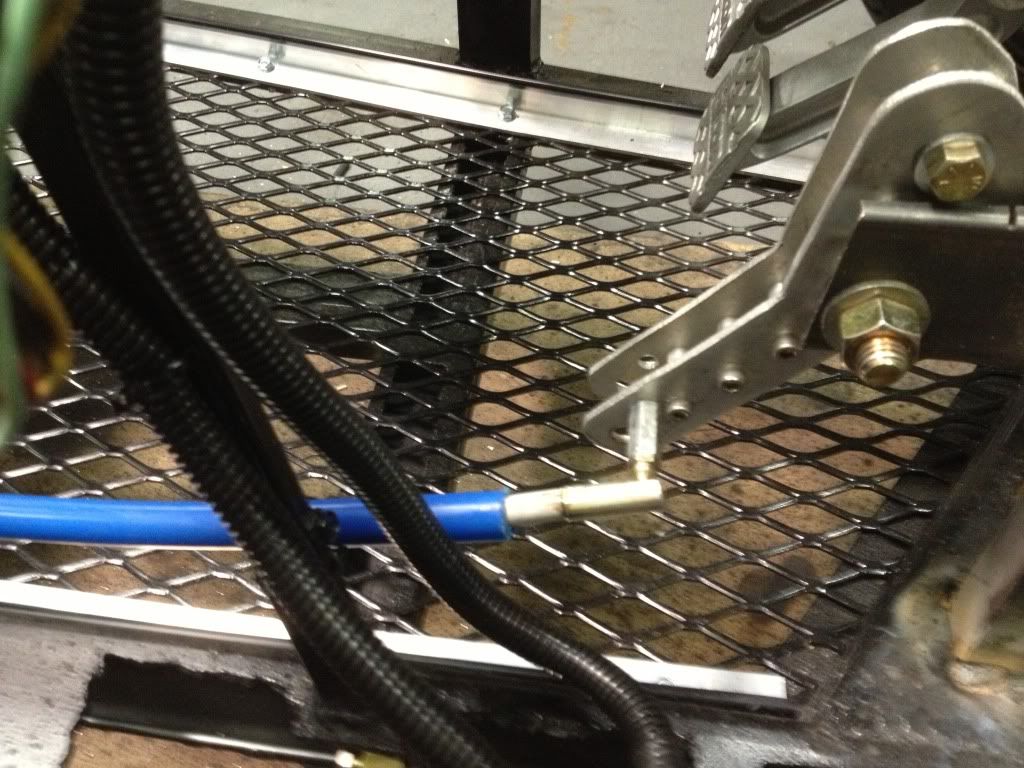 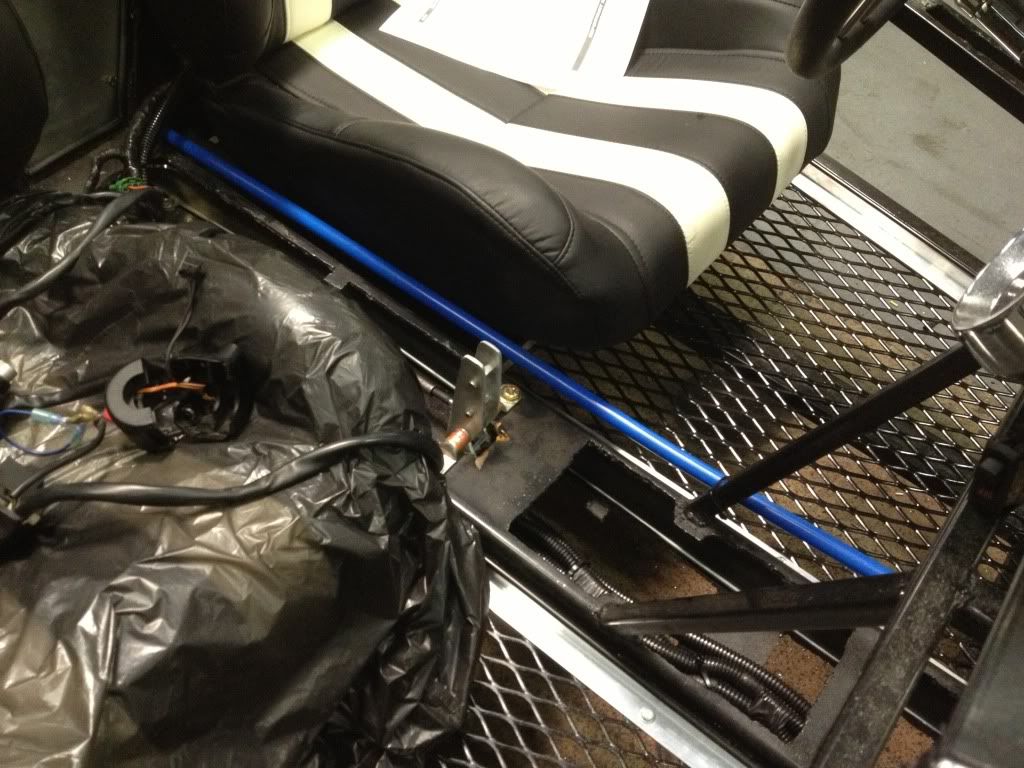 Fog lights and dual HI|LO beam motorcycle lights installed and working now. 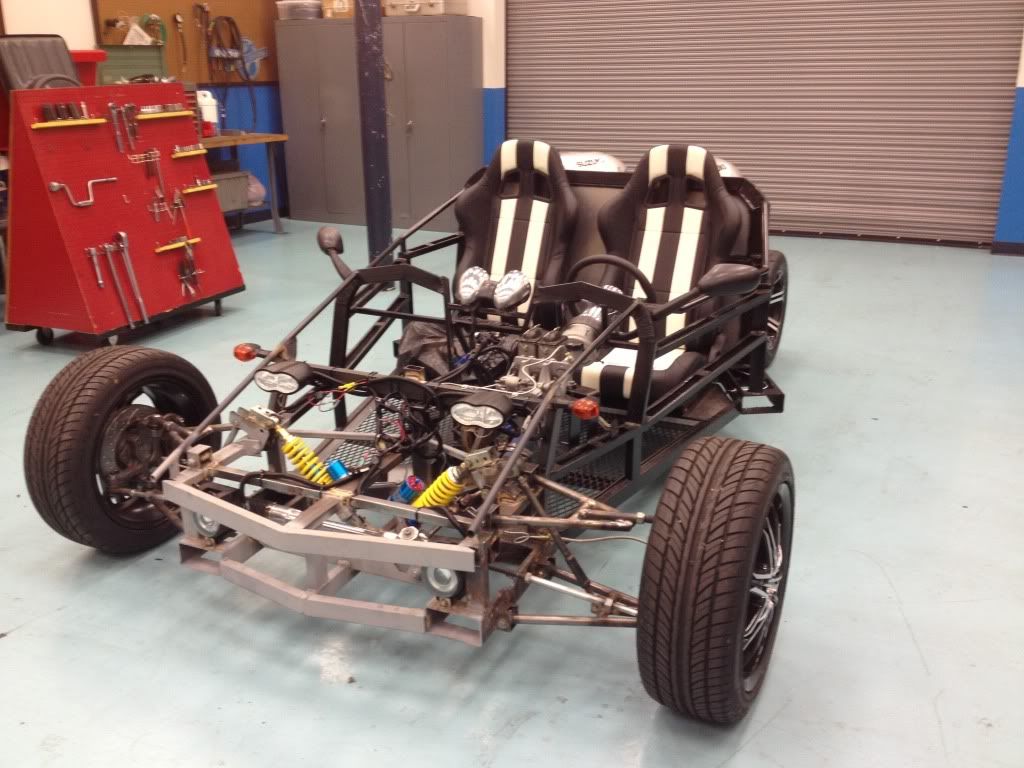 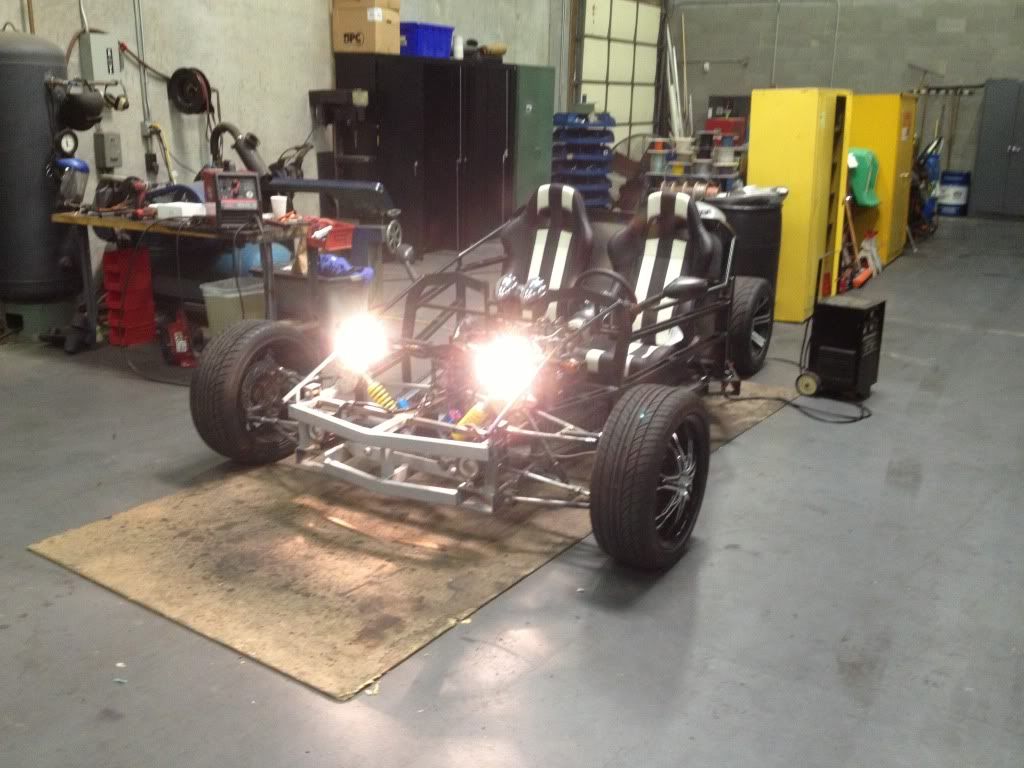 Got a larger oild cooler and electric fan mounted in the back along with both fuel tanks and the exhaust is coming soon to connect to the rear outlet to continue out the back. 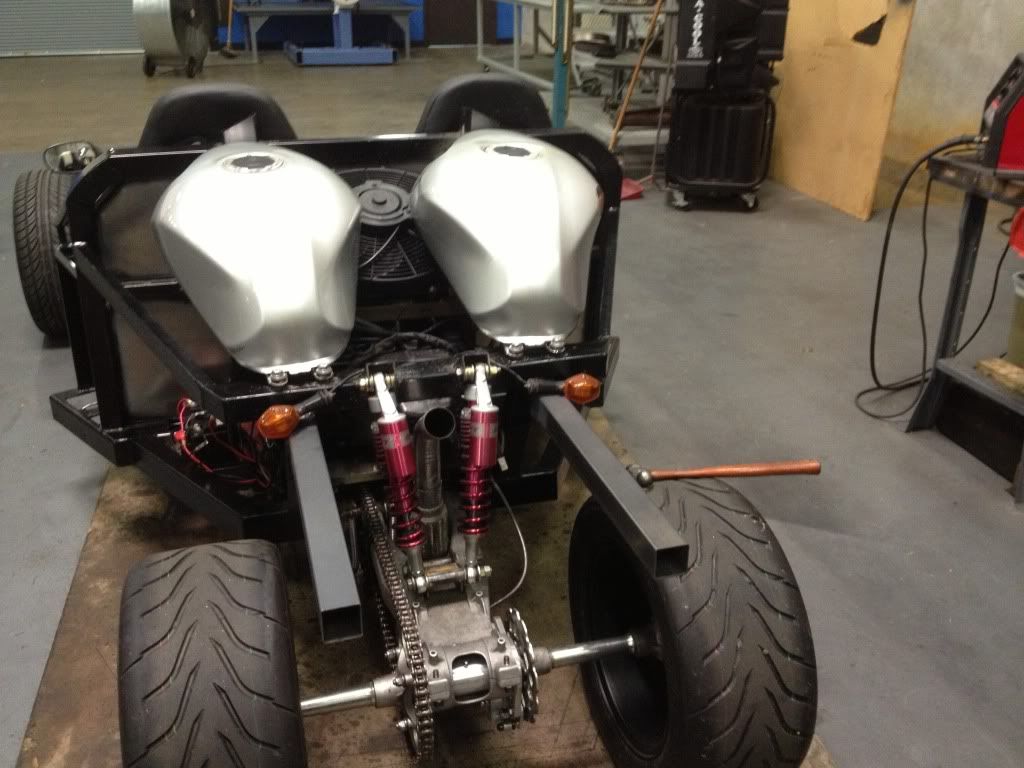 Just moving right along............. |
|
|
|
Post by joeld0803 on Nov 20, 2012 17:36:06 GMT -5
|
|
|
|
Post by captainamerica on Jan 2, 2013 7:07:36 GMT -5
Just curious, what type of welding are you using for your chassis? How does your fuel delivery system work with the two tanks? any plan for anti-roll front or rear? whats the plan for the bodywork if any?
Andrew
|
|
|
|
Post by Liteway on Jan 3, 2013 20:10:10 GMT -5
Hope you don't mind me butting in here Joel. No need for anti-roll bar at the rear as the ATV stuff allows zero roll compliance. Combined with no differential, should result in some interesting handleing characteristics. Loyd.
|
|
|
|
Post by Liteway on Jan 3, 2013 20:50:07 GMT -5
If there is some roll allowed at the front and none at rear, won't cornering result in a large twist load at the swing arm attachment point?
|
|
|
|
Post by joeld0803 on Jan 4, 2013 9:10:11 GMT -5
Everything has been on hold since the holidays. I'll get back to it soon.
As far as the body, I'll be using a combination of foam, and fiberglass to cover the frame. I have test driven it several times and it does handle very smooth on bumps but I do feel I will still need to do some tweaking on the front suspension.
There is some twist force going on at the rear swing arm during turns. The same as there would be if it was a four wheeler but to be honest the handling seems very good so far without really running it through further tests. I am still working out issues with chain slippage and fighting the drive ratio a little.
|
|